
Table of Contents
- Why Alcohol Markers Belong in Your Adult Coloring Kit
- Alcohol Marker Blending Techniques for Beginners
- How to Prevent Marker Bleed Through
- Best Paper for Alcohol Markers
- Color Theory for Markers: Building Depth and Dimension
- Refilling and Nib Maintenance for Long-Lasting Markers
- Coloring Without Streaks: Tips for Smooth, Even Color
- Conclusion
- Frequently Asked Questions
Last Updated: September 23, 2026
Why Alcohol Markers Belong in Your Adult Coloring Kit
Alcohol markers have become a favorite tool for adult coloring techniques alcohol markers enthusiasts because they deliver smooth, vibrant color with minimal effort. Unlike water-based markers that leave streaks and dry unevenly, alcohol-based ink flows into the paper fibers and self-levels as it dries. That single property changes what’s possible on the page.
The trade-off is real: the solvent in these markers soaks through most paper, and the nibs wear down with heavy use. Both issues are solvable once you understand how the ink behaves.
Below, we’ll walk through the blending methods, paper choices, and maintenance habits that make alcohol markers work reliably, even if you’ve never used them before.
Alcohol Marker Blending Techniques for Beginners
Blending with alcohol markers works because the solvent reactivates ink that’s still wet. You don’t need special skill, just timing and the right sequence of colors.
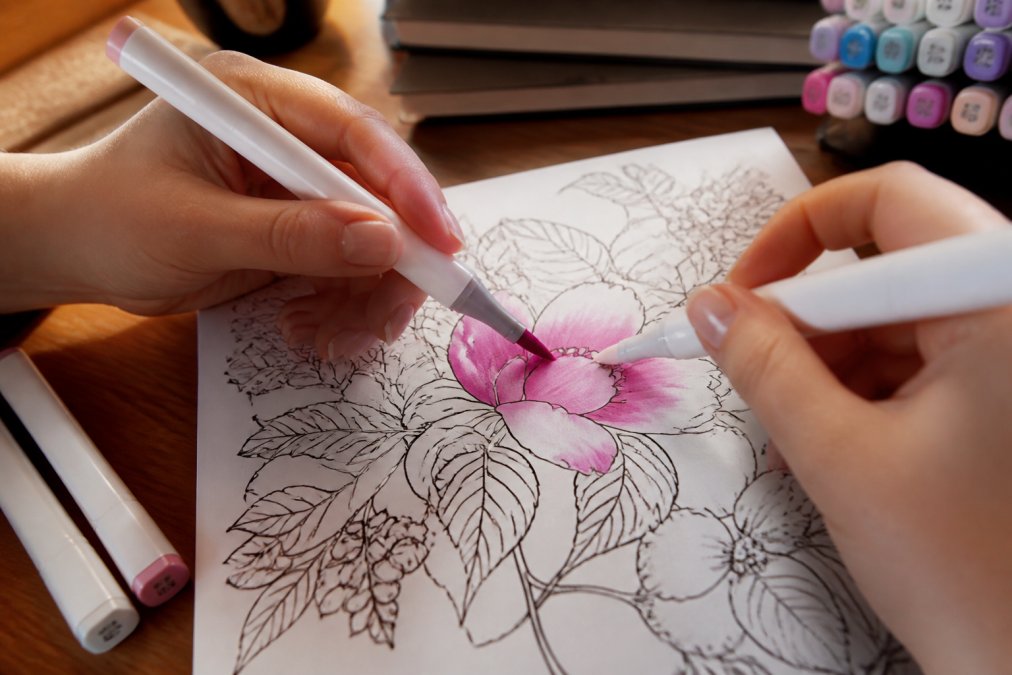
Light to Dark Layering
Start with your lightest color and work toward the darkest. Apply the light shade first across the full area, then add the mid-tone where the shadow begins, and finish with the darkest shade at the deepest point. Because alcohol ink stays workable for a short window, each layer pulls into the one beneath it and creates a gradient without harsh lines.
A common mistake is starting dark. Once dark ink sits on the page, you cannot lighten it. Build up slowly and stop earlier than you think you should.
Wet-on-Wet Blending and the Colorless Blender
Wet-on-wet blending means applying two colors while both are still damp so they merge at the seam. Touch the tip of your darker marker to the edge of the lighter stroke and pull the color outward in small circles.
The colorless blender is a marker filled with solvent and no pigment. Run it along a hard edge to soften the transition, or use it to lift color and create highlights.
Keep a scrap sheet beside your work and test every blend there first. Alcohol ink dries fast, and the color on the page often looks different from the marker cap.
How to Prevent Marker Bleed Through
Bleed through happens when solvent carries pigment through the paper to the sheet underneath. The fix is paper selection and a barrier layer, not less ink.
Troubleshooting Feathering and Bleeding
Feathering is ink spreading sideways past the line you drew, creating a fuzzy edge. It usually means the paper’s fibers are too loose or the surface coating is too thin. Bleeding is the same problem in a different direction: ink traveling through the sheet.
Three fixes that work in practice:
- Switch to a heavier, coated paper stock
- Slow down and let each layer dry before adding the next
- Avoid pressing the nib flat against the page for long strokes
Best Paper for Alcohol Markers
The best paper for alcohol markers is smooth, coated, and heavy enough to resist soak-through. Look for a weight around 100 gsm or higher with a sealed surface, often sold as marker paper or bleed-proof paper. But weight alone doesn’t tell you whether a sheet will work. The chemistry of the coating matters just as much.
Why Coating Chemistry Decides Everything
Alcohol ink is a solvent carrier: pigment suspended in an alcohol base that evaporates quickly. When that solvent hits paper, one of three things happens depending on the surface.
- Coated marker paper has a clay or silica-based layer that seals the fibers. The solvent sits on top long enough for pigment to level, then flashes off. This is why blending works on marker paper and fails on copy paper.
- Uncoated cardstock absorbs solvent straight into the fiber mat. Ink sinks, edges bloom, and the surface pills if you scrub.
- Mixed-media paper sits in between. Its sizing (the internal glue that holds fibers together) resists some solvent, but the visible tooth grabs nibs and can feather fine lines.
Matching Paper to Marker Brand
Most major marker lines are formulated for their own paper, and the pairing is not marketing fluff. A heavily pigmented marker on a thin coated sheet will still bleed; a lightly pigmented marker on a heavy uncoated sheet will look chalky because the ink sinks before it levels. If you switch brands, test a swatch first.
| Paper Type | Weight Range | Best For | Watch Out For |
|---|---|---|---|
| Marker paper | 70-110 gsm | Blending, fine detail | Thin sheets can still bleed |
| Coated cardstock | 200 gsm+ | Layered work, gifts | Slower ink absorption |
| Mixed-media paper | 120-200 gsm | Combined pencil and marker | Surface texture can feather |
| Copy paper | 75-90 gsm | Practice only | Heavy bleed and pilling |
A Simple Compatibility Test
Before committing a full page, run this three-step test on any new sheet:
- Draw a single stroke and time how long the edge stays glossy. If it flashes in under two seconds, the paper is drinking solvent and will feather.
- Overlap two colors while the first is still wet. If they merge cleanly, the coating is holding ink on the surface.
- Flip the sheet and check the back. A faint shadow is normal; a wet blot means the sheet is too porous for layered work.
Color Theory for Markers: Building Depth and Dimension
Depth comes from value, not from the number of colors you own. A single color family with three values, light, mid-tone, and shadow, will out-perform a dozen unrelated shades. But alcohol markers add a twist most color theory guides ignore: because the ink is translucent, every layer you place mixes optically with what’s underneath. You are not just choosing colors, you are choosing a sequence.
Value First, Hue Second
Pick a base color, then choose one shade lighter and one or two shades darker within the same family. Use the light value for highlights, the mid-tone for the main body of the shape, and the dark value for shadows and contact points. This three-value approach is the fastest way to make flat line art look three-dimensional.
Complementary and Analogous Palettes
Once your values are set, color relationships do the emotional work.
- Analogous palettes use neighbors on the color wheel, like red, red-orange, and orange. They produce calm, cohesive images and are forgiving for beginners because every combination already harmonizes.
- Complementary palettes pair opposites, like blue and orange or red and green. They create vibration and focal points, but only when one color dominates and the other accents. Equal amounts of complements fight each other.
- Split-complementary takes one base and pairs it with the two neighbors of its opposite. This gives contrast without the harshness of a true complement and is a reliable choice for skin tones and foliage.
How Translucency Changes the Rules
Because alcohol ink is see-through, layered values mix optically on the page and stay in the same color family. That’s why marker work looks cohesive even when you use many shades. But it also means order matters: laying a warm yellow over a cool blue produces a greenish cast, while laying blue over yellow produces a different green.
Three values per color family, applied light to dark, produce more depth than any single expensive marker set. Add one complementary accent only after the values are locked in.
Refilling and Nib Maintenance for Long-Lasting Markers
Markers dry out from the nib, not the barrel. Keep the cap on when you’re not actively coloring, store them horizontally so ink reaches both ends of the nib, and you’ll extend their working life considerably.
- Store markers horizontally, not upright
- Recap immediately after each use
- Wipe nibs on scrap paper to clear dried pigment
- Replace frayed nibs before they scratch the paper
Coloring Without Streaks: Tips for Smooth, Even Color
Streaks come from stopping mid-stroke and from ink drying before the next pass connects. The fix is speed and overlap.
Coloring over a dried section with a fresh pass creates a visible dark line at the seam. If you need more coverage, rewet the area with a colorless blender first.
Conclusion
Alcohol markers reward preparation more than talent. The right paper, a light-to-dark sequence, and a habit of recapping your markers will carry you further than any single technique.
Frequently Asked Questions
What are the downsides of using alcohol markers?
Alcohol markers can bleed through thin paper and have a strong odor due to their solvent base. They also dry out if not capped properly and are generally more expensive than water-based markers. However, using bleed-proof paper and storing markers horizontally can minimize these issues. For adult coloring, their vibrant, blendable ink often outweighs the drawbacks.
Do you start with light or dark colors when using alcohol markers?
Always start with your lightest color first, then layer darker shades on top. This light-to-dark approach allows you to build depth gradually and avoid overpowering the page. If you start dark, it’s difficult to lighten the area without a colorless blender. Practice on a swatch sheet to see how your colors interact before applying to your final piece.
How do you prevent alcohol markers from bleeding through the page?
Place a blotter sheet or scrap paper underneath your coloring page to absorb excess ink. Choose paper specifically designed for alcohol markers, such as bleed-proof cardstock with a higher gsm. Work in light layers and avoid saturating one spot. These steps keep your artwork clean and protect the pages beneath.
What is the difference between alcohol-based and water-based markers?
Alcohol-based markers use a solvent that evaporates quickly, allowing for smooth blending and vibrant, translucent layers. Water-based markers are less odorous and easier to clean up, but they tend to pill paper and produce less saturated color. For adult coloring techniques that require gradients and depth, alcohol markers are often preferred.
Building a coloring practice that actually relaxes you starts with the right page under your hand. Beautiful Coloring Books offers a curated collection of more than 320 creative inspirations across nature, fantasy, and abstract themes, with designs suited to every skill level. Our books are made for exactly this kind of work: smooth color, real blending, and pages that hold up to marker use. Browse the collection and find the design that fits your next session.
